APAW Week 2: Jekyll Blog Setup
This week I wanted to focus on a slightly more casual project as I was beginning my summer job. I decided to get my personal github.io site (the one you’re on now) set up using jekyll, a ruby-based blog framework, and to push through some of the posts I had written up.
The repo for this website can be found here.
Getting A Ruby Install Working
To start with Jekyll you need a ruby environment, there are a few ways to install one such as with your system package manager, but due to issues with that I used ruby-install.
Ruby-install can be built by running the following bash commands (note: the version will need to be updated if you’re running this code at a later date):
wget https://github.com/postmodern/ruby-install/releases/download/v0.9.3/ruby-install-0.9.3.tar.gz
tar -xzvf ruby-install-0.9.3.tar.gz
cd ruby-install-0.9.3/
sudo make install
Upon installing ruby-install the following commands can be run to bootstrap the latest version of ruby:
ruby-install # Downloads the available versions and lists them
ruby-install ruby # Installs the latest ruby version
You may then need to export the downloaded ruby folder to your path, for example by adding the following to your .bashrc:
export PATH="~/.rubies/ruby-<version>/bin/:$PATH"
If all has worked well you should get the ruby version by running the following in a terminal:
ruby --version
Installing Jekyll & Creating The Site
To install jekyll simply run:
gem install jekyll bundler
Then in a folder where you’d like to start a new site run:
jekyll new .
This should create a site which can then be run by executing the following, which gives you an address to go to:
bundle exec jekyll serve
Getting The Site Up On Github Pages
Getting the site up on github pages is surprisingly easy. A long time ago I had a site up via Hugo, a Golang-based static site generator, and that involved a lot of hassle with github actions, special branches etc., but thanks to Github having first-party support for jekyll (and jekyll even provides a .gitignore to start) all that’s needed is to push the site contents to a repo named yourusername.github.io and the enabling the following in your repository settings under ‘Pages’:
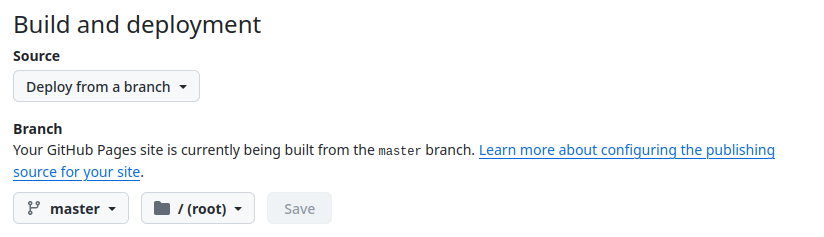
Then you simply have to wait for github to deploy the site, and if there are no issues shown on the repo home page it should be live at https://yourusername.github.io.
What I Learned
I think my biggest takeaway is quite how nice the direct Github integration is with jekyll. Having used Github Actions to deploy a Hugo site, which involved configuring complex setups and actions that build to branches I was very relieved by the setup process. It was nice to refresh the github pages process and most importantly to learn how pleasant and easy it is with jekyll, which is definitely the technology I support using for user and project websites on the Github Pages ecosystem going forward.